I can help you transform your home with easy Easter crafts using supplies you likely already have. From
Quick Tips
- Paper plate bunny garlands are quick crafts using white plates, markers, and cotton balls for festive decoration.
- Mason jar luminaries with bunny silhouettes create soft glowing centerpieces using cardstock and tea lights.
- Tissue paper flowers offer budget-friendly, customizable blooms that won’t wilt for lasting table arrangements.
- Marbled egg dye craft produces unique designs on hard-boiled eggs using food coloring, oil, and water.
- Napkin fold bunnies transform simple napkins into charming place card decorations secured with ribbon.
Paper Plate Bunny Garland
If you’re looking for a decoration that’s both adorable and easy to make, this paper plate bunny garland is exactly what you need. I’d grab white paper plates, markers, and string to create it.
Cut each plate in half, then draw bunny faces with pink noses and floppy ears. You can add cotton ball tails for extra texture and charm. String them together with twine or ribbon, spacing them a few inches apart.
Hang your garland across a doorway, mantel, or wall to instantly brighten your Easter space. It takes minimal time but delivers maximum festive impact.
Napkin Fold Bunny Place Cards
Napkin fold bunnies bring charm and personality to your Easter table, and they’re easier to create than you might think.
I find that white or pastel napkins work beautifully for this project. Start by folding your napkin in half diagonally to form a triangle. Roll it tightly from the base, then fold the top point down to create the bunny’s ears.
Secure everything with a small ribbon or place card tucked into the fold. Position each bunny at your guests’ seats, and you’ve instantly elevated your table with handmade elegance that feels personal and thoughtful.
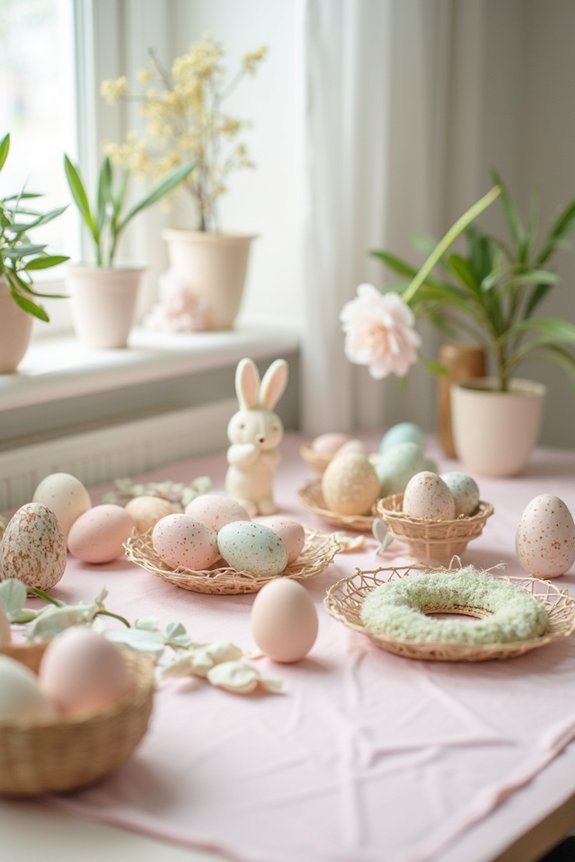
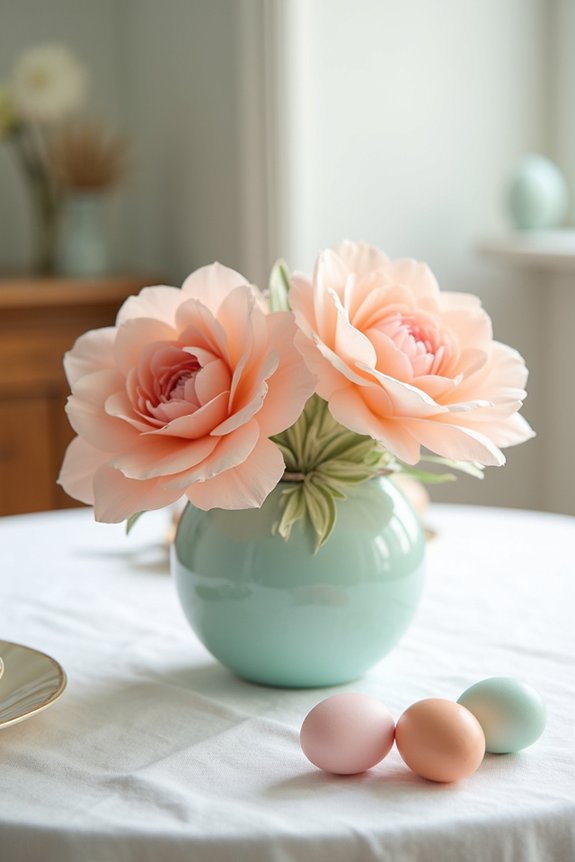
Painted Egg Vase Fillers
Painted egg vase fillers bring springtime charm to any arrangement, and you’ll love how simple they’re to create. I find that plastic eggs work best since they’re lightweight and durable.
Start by selecting soft pastels or vibrant hues that match your color scheme. Apply acrylic paint with a brush or sponge for smooth coverage, then let them dry completely.
You can add patterns like stripes, dots, or florals for extra personality. Fill clear vases with these painted eggs alongside fresh flowers or greenery to create stunning centerpieces that guests will admire.
Tissue Paper Flower Centerpiece
When you’re looking for a centerpiece that’s both budget-friendly and absolutely stunning, tissue paper flowers deliver exactly that.
I love how simple materials transform into something elegant and festive. You’ll stack colored tissue paper squares, fold them in half repeatedly, then fan out each layer to create full, dimensional blooms.
Arrange several flowers in a vase with greenery for instant spring charm. The best part? You can customize colors to match your Easter table perfectly.
These flowers won’t wilt, so you can make them days ahead without worry.
Mason Jar Bunny Luminary
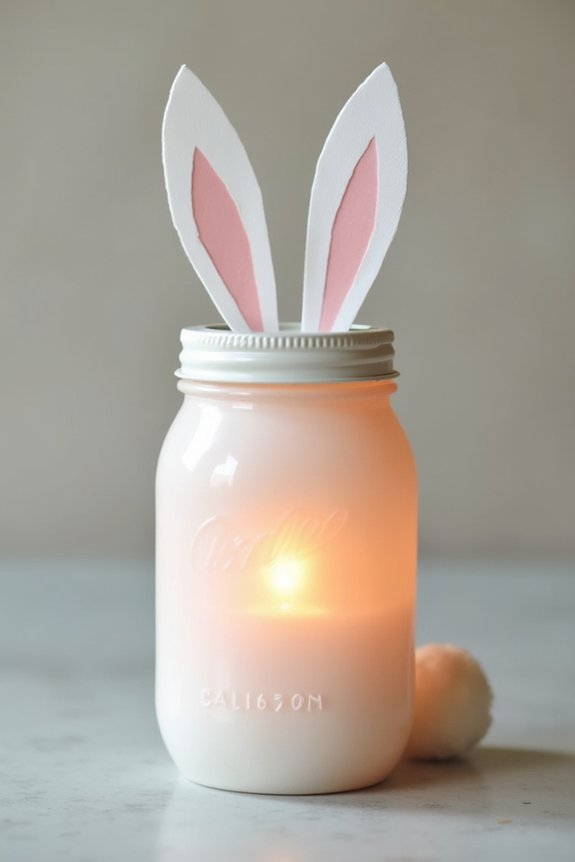
Soft, glowing light paired with adorable bunny silhouettes creates the perfect Easter ambiance, and mason jars make the ideal canvas for this charming project.
I’ll guide you through creating these delightful luminaries that’ll transform your Easter table.
Here’s what you’ll need:
- Mason jars in various sizes
- White cardstock or vellum paper
- Bunny silhouette templates
- Tea lights or battery-operated candles
- Tape or glue
Trace bunny shapes onto cardstock, then wrap the paper around your jar. Secure it with tape, place a light inside, and watch the soft glow bring your bunnies to life.
These luminaries work beautifully as centerpieces or scattered throughout your space.
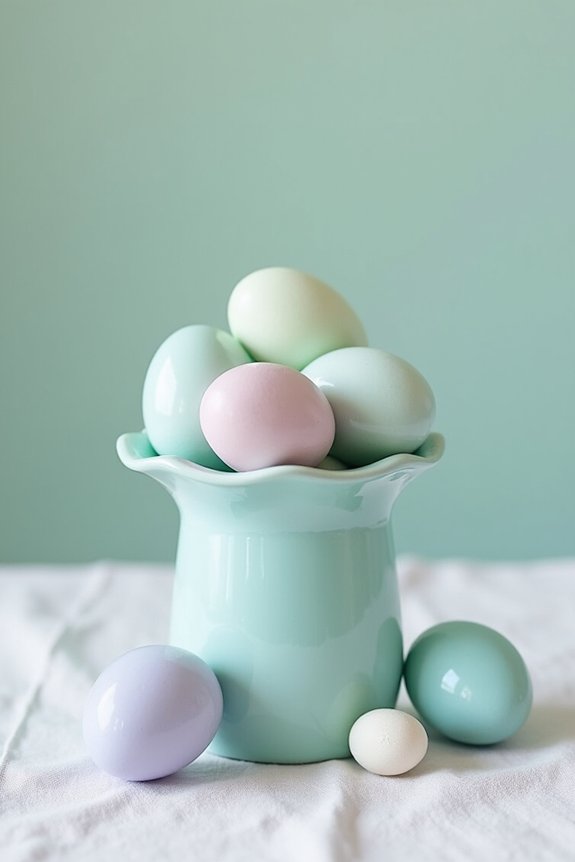
Marbled Egg Dye Craft
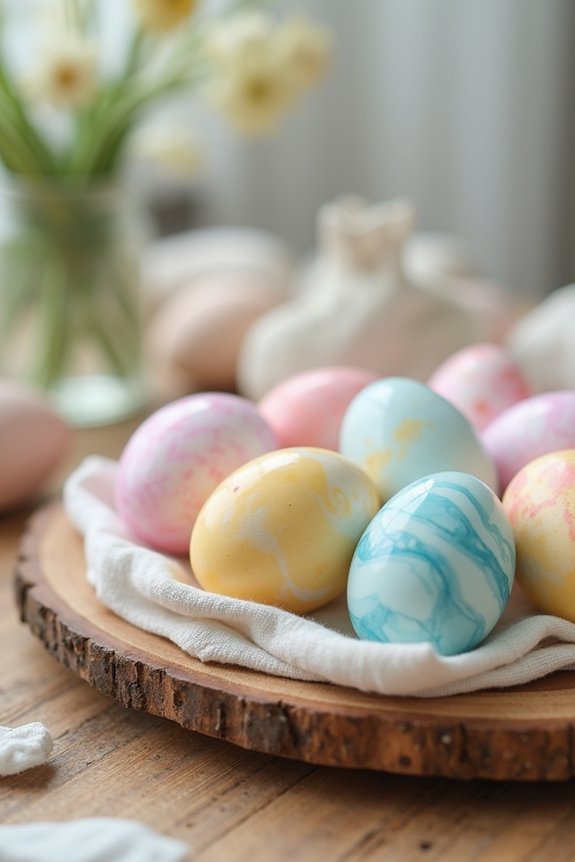
Creating marbled eggs brings an artistic flair to your Easter celebration, and I love how this technique transforms simple eggs into stunning works of art.
You’ll swirl food coloring, oil, and water together to create mesmerizing patterns on your eggs. Simply dip hard-boiled eggs into the mixture, and watch as beautiful designs coat the shells. The unpredictable results mean each egg becomes truly unique.
I find this craft incredibly satisfying because you’ll achieve gallery-worthy decorations with minimal effort. Kids and adults alike enjoy the process, making it perfect for family gatherings or solo projects.
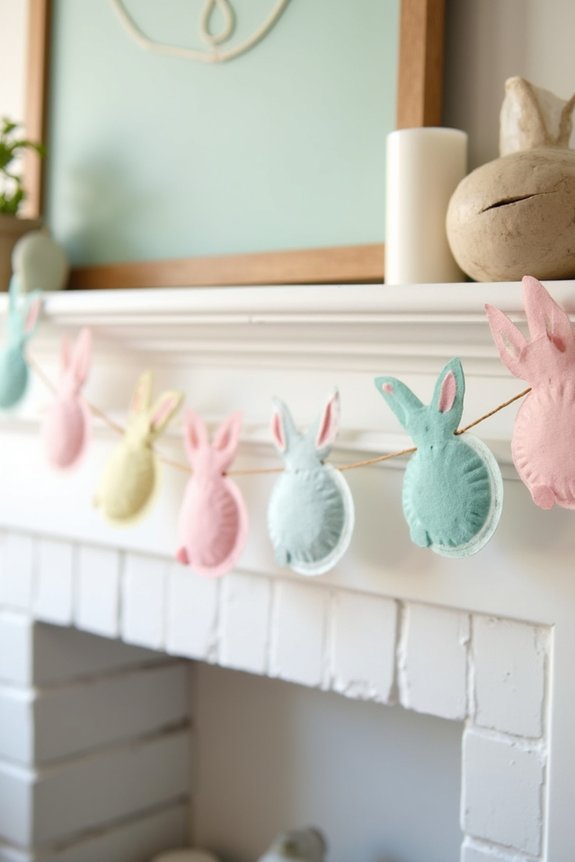
Felt Bunny Banner
A felt bunny banner brings cheerful charm to any space, and you’ll love how simple it’s to make.
I’ll guide you through creating this delightful decoration that transforms your Easter setup.
Here’s what you’ll need:
- Colorful felt sheets in pastels
- Scissors and a hot glue gun
- Twine or ribbon for hanging
- Bunny templates printed or drawn
- Optional embellishments like googly eyes
Cut bunny shapes from felt, varying sizes and colors for visual interest.
String them along twine, spacing them evenly.
Add personality with felt details or markers.
This banner works beautifully across mantels, doorways, or party walls, instantly elevating your Easter ambiance with handmade warmth. Consider pairing your felt bunny banner with other Easter decorations throughout your home for a cohesive festive look.
Wooden Egg Hunt Baskets
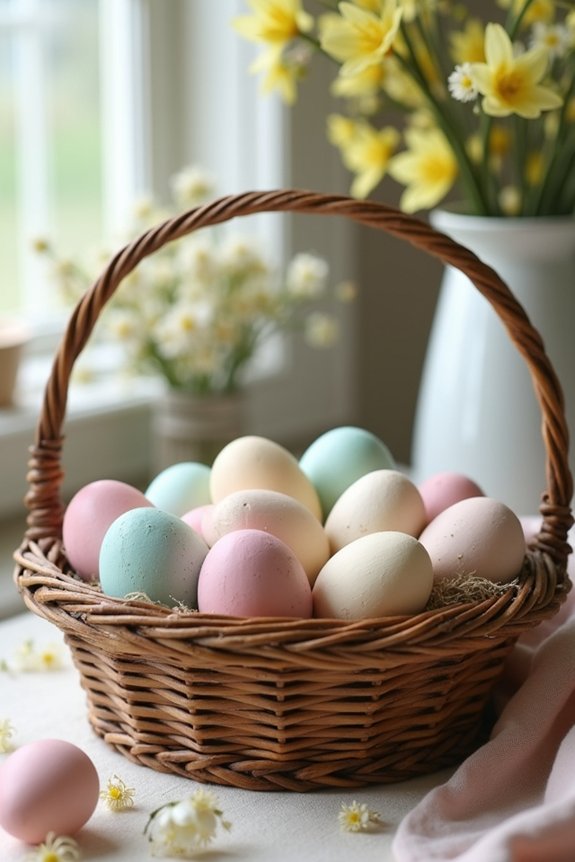
Wooden egg hunt baskets bring warmth and reusability to your Easter celebrations, making them far superior to single-use paper or plastic alternatives.
I love how these baskets become cherished keepsakes your family uses year after year. You can personalize them by painting each child’s name or adding decorative designs with acrylic paint. Natural wood stain works beautifully too, letting the wood grain shine through.
Fill them with grass, chocolate eggs, and small toys for an eco-friendly hunt. These baskets transform Easter into something meaningful and sustainable that your family will treasure for generations.
Carrot Treat Box
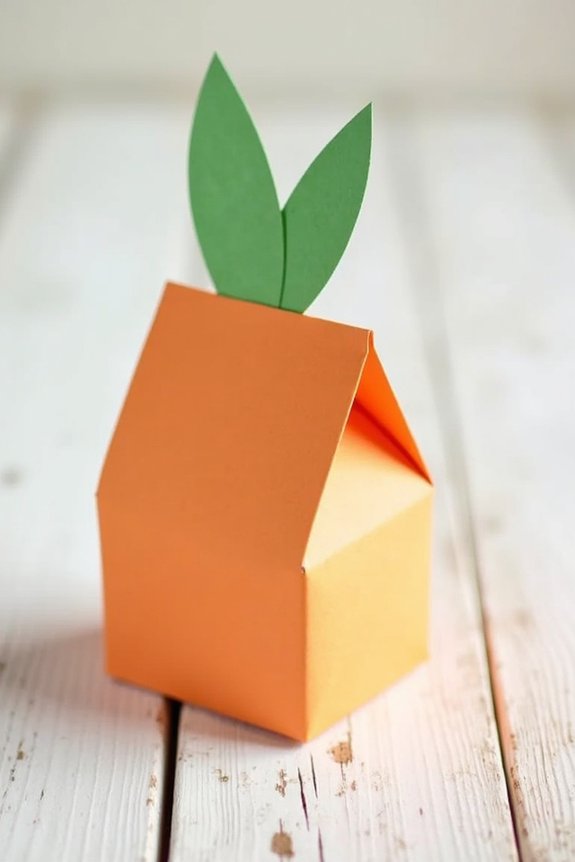
If you’re looking for a festive way to package treats for Easter guests or fill baskets with style, the carrot treat box deserves a spot on your celebration plans.
I love how this craft combines creativity with practicality.
You’ll need:
- Orange cardstock or construction paper
- Green tissue paper or crepe paper
- Small treats like chocolates or candies
- Tape and scissors
- Optional: markers for details
Roll orange paper into a carrot shape, secure it with tape, then gather green paper at the top for leafy stems.
Fill with treats before sealing.
This charming box adds personality to your Easter spread while keeping goodies fresh and beautifully presented. Explore more creative Easter ideas to elevate your holiday celebration with unique and memorable touches.
Pressed Flower Easter Cards
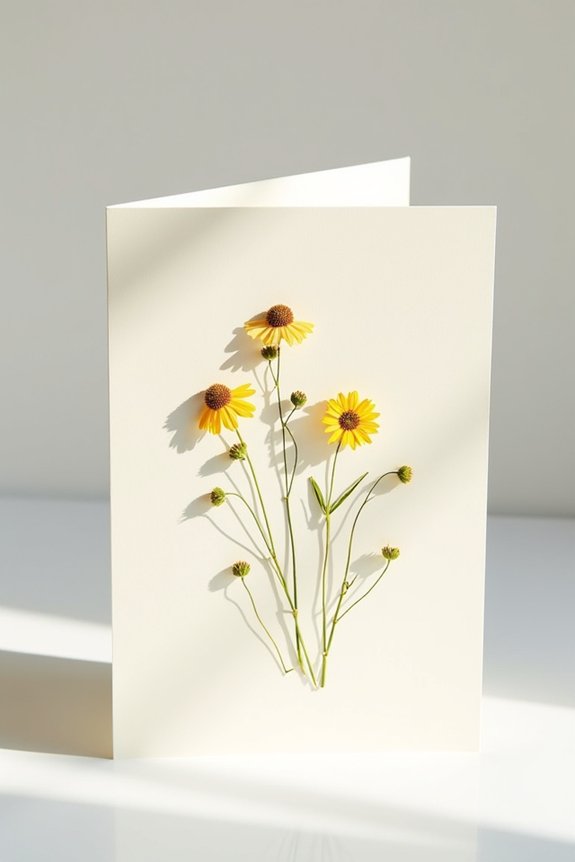
While those adorable carrot boxes make wonderful treats holders, handmade cards let you express Easter wishes in equally meaningful ways.
I love pressing flowers between parchment paper inside a heavy book for two weeks. Once dried, you’ll arrange them on cardstock, securing each delicate bloom with tiny dots of glue.
Add watercolor washes in soft pastels, then write your heartfelt message inside. These cards feel personal and thoughtful, showing recipients you invested time creating something special.
Your guests will treasure handmade cards far longer than store-bought versions, making each Easter greeting truly memorable.
Frequently Asked Questions
How Far in Advance Should I Prepare These DIY Easter Decorations for My Party?
I’d recommend starting two to three weeks before your party. This gives you time to gather supplies, complete crafts without rushing, and make adjustments. For simpler decorations, one week ahead works fine.
What’s the Best Way to Store Finished Decorations Between Easter Celebrations?
I treat my finished decorations like treasures in a time capsule. I store them in labeled plastic bins with tissue paper separating each piece, keeping them in a cool, dry closet away from sunlight to preserve their vibrant colors year after year.
Can I Adapt These Crafts for Outdoor Easter Egg Hunts and Garden Parties?
I’d adapt these crafts by using weather-resistant materials like plastic eggs and outdoor-safe paints. You’ll want to secure lighter decorations so wind doesn’t scatter them, and choose shaded spots for delicate pieces.
Which Decorations Are Safe to Make With Young Children Helping?
I’d recommend paper egg garlands, painted flower pots, and tissue paper butterflies—they’re perfect for little hands. Avoid hot glue guns and small choking hazards. You’ll love watching them create keepsakes you’ll treasure.
How Do I Protect Delicate Paper and Tissue Decorations From Humidity and Moisture?
I seal my paper and tissue decorations with a clear acrylic spray coating, which creates a moisture barrier. You’ll also want to store them in airtight containers with silica gel packets to absorb any ambient humidity.